Building and Deploying a Container Image on OpenShift using GitLab CI/CD
In this blog post, we’ll walk through the process of building a container image using OpenShift and GitLab CI/CD. We will utilize the .gitlab-ci.yml file, a Dockerfile, and some simple HTML and Python code to demonstrate the build process. This guide assumes you have some basic knowledge of GitLab CI/CD and OpenShift.
Prerequisites
Before we begin, ensure you have the following:
- Access to an OpenShift cluster. You can try Openshift with our free Sandbox : developer-sandbox
- A GitLab repository. GitLab Ultimate free trial
- Necessary permissions to create and manage projects in OpenShift.
Step 1: Setting up the GitLab CI/CD Pipeline
First, we need to define our GitLab CI/CD pipeline in a .gitlab-ci.yaml file. This file specifies the stages and jobs that GitLab will execute.
Here’s an example of the .gitlab-ci.yaml file:
stages:          # List of stages for jobs, and their order of execution
  - build

build-job:       # This job runs in the build stage, which runs first.
  stage: build

  script:
    - wget -qO- https://downloads-openshift-console.apps.cluster-h4js2.sandbox553.opentlc.com/amd64/linux/oc.tar  |tar xf -
    - chmod +x ./oc
    - echo "Login to OCP"
    - ./oc login --insecure-skip-tls-verify=true --token="$OCP_TOKEN" --server="$OCP_SERVER"
    - echo "Selecting project"
    - ./oc project "${OCP_PROJECT}"
    - ./oc start-build my-docker-build --from-dir . -F
# Change : https://downloads-openshift-console.apps.cluster-h4js2.sandbox553.opentlc.com with your Openshift API url.
Add the Variables in the project on GITLAB :
- OCP_PROJECT : name of the namespace in Openshift for the project
- OCP_SERVER : url of the Openshift API
- OCP_TOKEN : Token for the authentification on Openshift

Step 2: Creating the Container File (Dockerfile)
Next, we need to create a Dockerfile which will define our container image. Here’s a simple example:
FROM python:3
ADD index.html index.html
ADD server.py server.py
EXPOSE 8888
ENTRYPOINT ["python3", "server.py"]
Step 3: Adding Application Code
We’ll create a simple HTML file and a Python server script to include in our container image.
index.html:
<!DOCTYPE html>
<html>
<body>
<div align="center">
<br>
<br>Test OK
<br>
<br>
<br><img src="https://blog.fklein.me/images/Logo-Red_Hat.png">
</div>
</body>
</html>
server.py:
#!/usr/bin/python3
from http.server import BaseHTTPRequestHandler, HTTPServer
import time
import json
from socketserver import ThreadingMixIn
import threading

hostName = "0.0.0.0"
serverPort = 8888

class Handler(BaseHTTPRequestHandler):
  def do_GET(self):
      # curl http://<ServerIP>/index.html
      if self.path == "/":
          # Respond with the file contents.
          self.send_response(200)
          self.send_header("Content-type", "text/html")
          self.end_headers()
          content = open('index.html', 'rb').read()
          self.wfile.write(content)

      else:
          self.send_response(404)

      return

class ThreadedHTTPServer(ThreadingMixIn, HTTPServer):
  """Handle requests in a separate thread."""

if __name__ == "__main__":
  webServer = ThreadedHTTPServer((hostName, serverPort), Handler)
  print("Server started http://%s:%s" % (hostName, serverPort))

  try:
      webServer.serve_forever()
  except KeyboardInterrupt:
      pass

  webServer.server_close()
  print("Server stopped.")
Step 4: Configuring OpenShift
As we want to build from a Dockerfile, we will use the dockerstrategy with binary source (which allow to send local files from gitlab runner to OpenShift) : More information here
To build our Docker image in OpenShift, we need to create a BuildConfig. This configuration can be created using the following command:
oc new-build --binary --strategy=docker --name my-docker-build

Step 5: Running the Build
The final step is to trigger the build from GitLab. The .gitlab-ci.yaml file we created earlier includes the necessary commands to login to OpenShift, select the project, and start the build.
You just need to commit the files to the GITLAB repo to trigger the build.

Step 6: Deploy the container
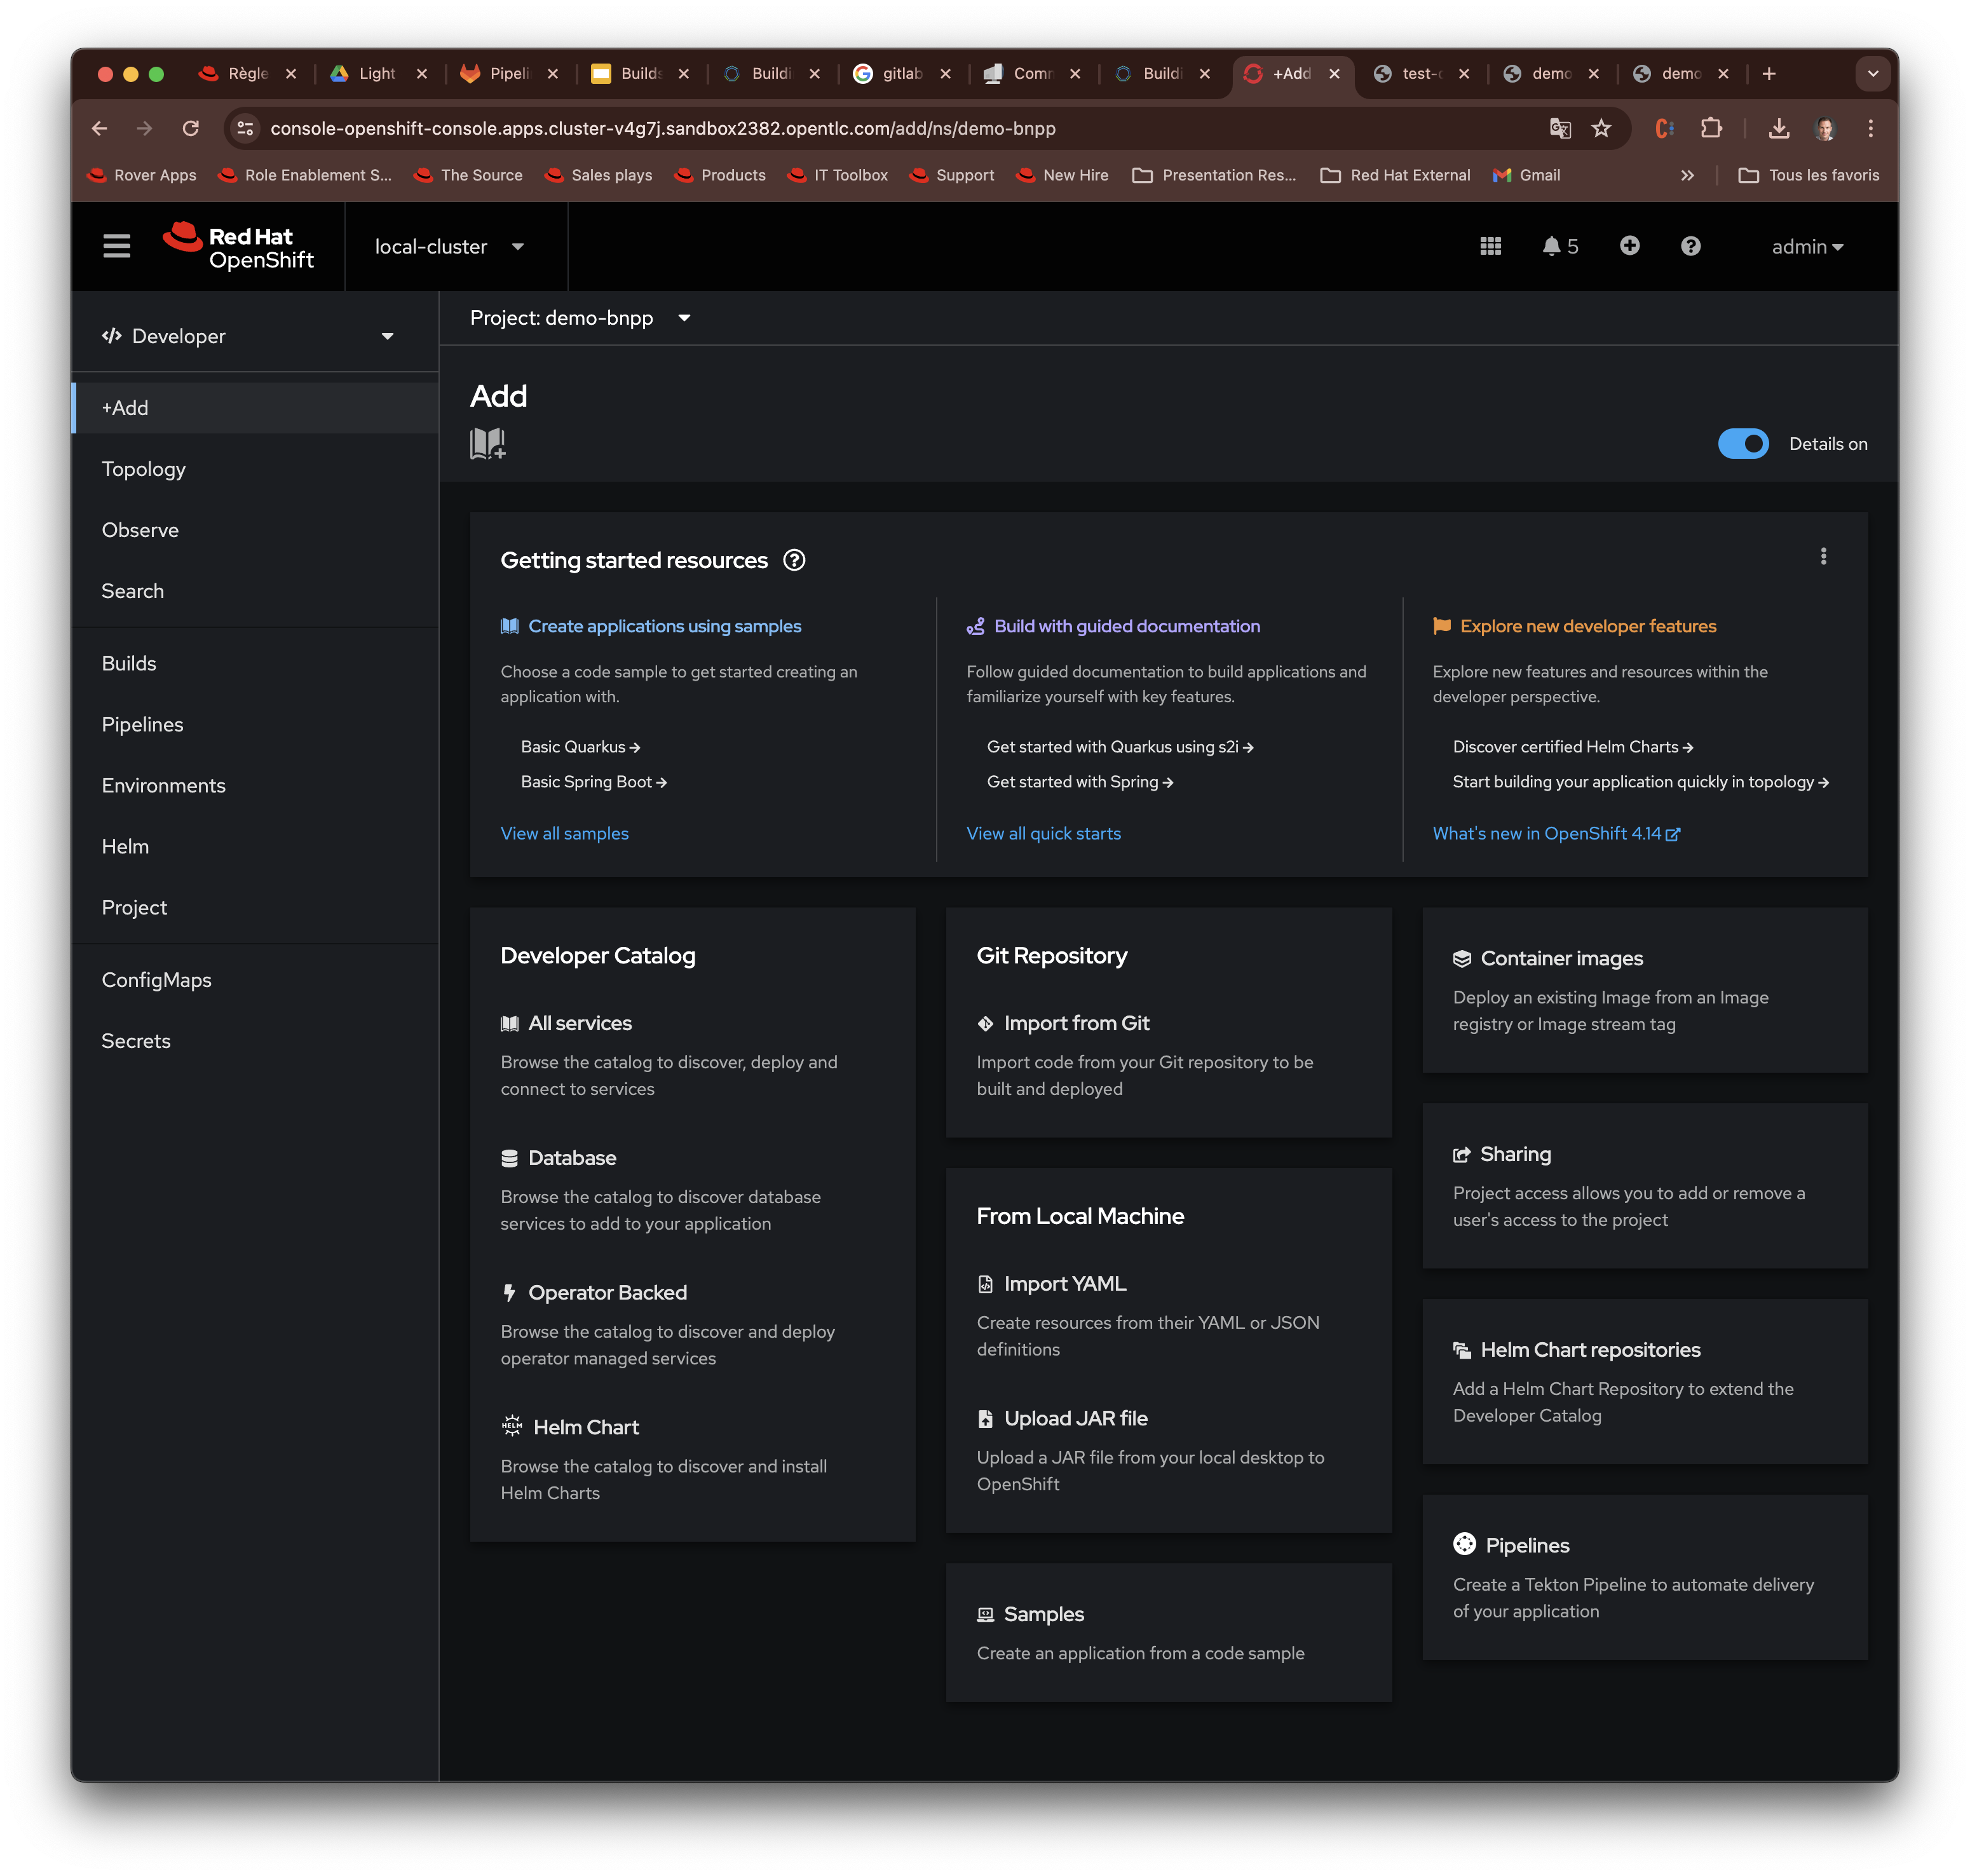
On Openshift UI, on the Developer profile, click on +Add, and Container Images

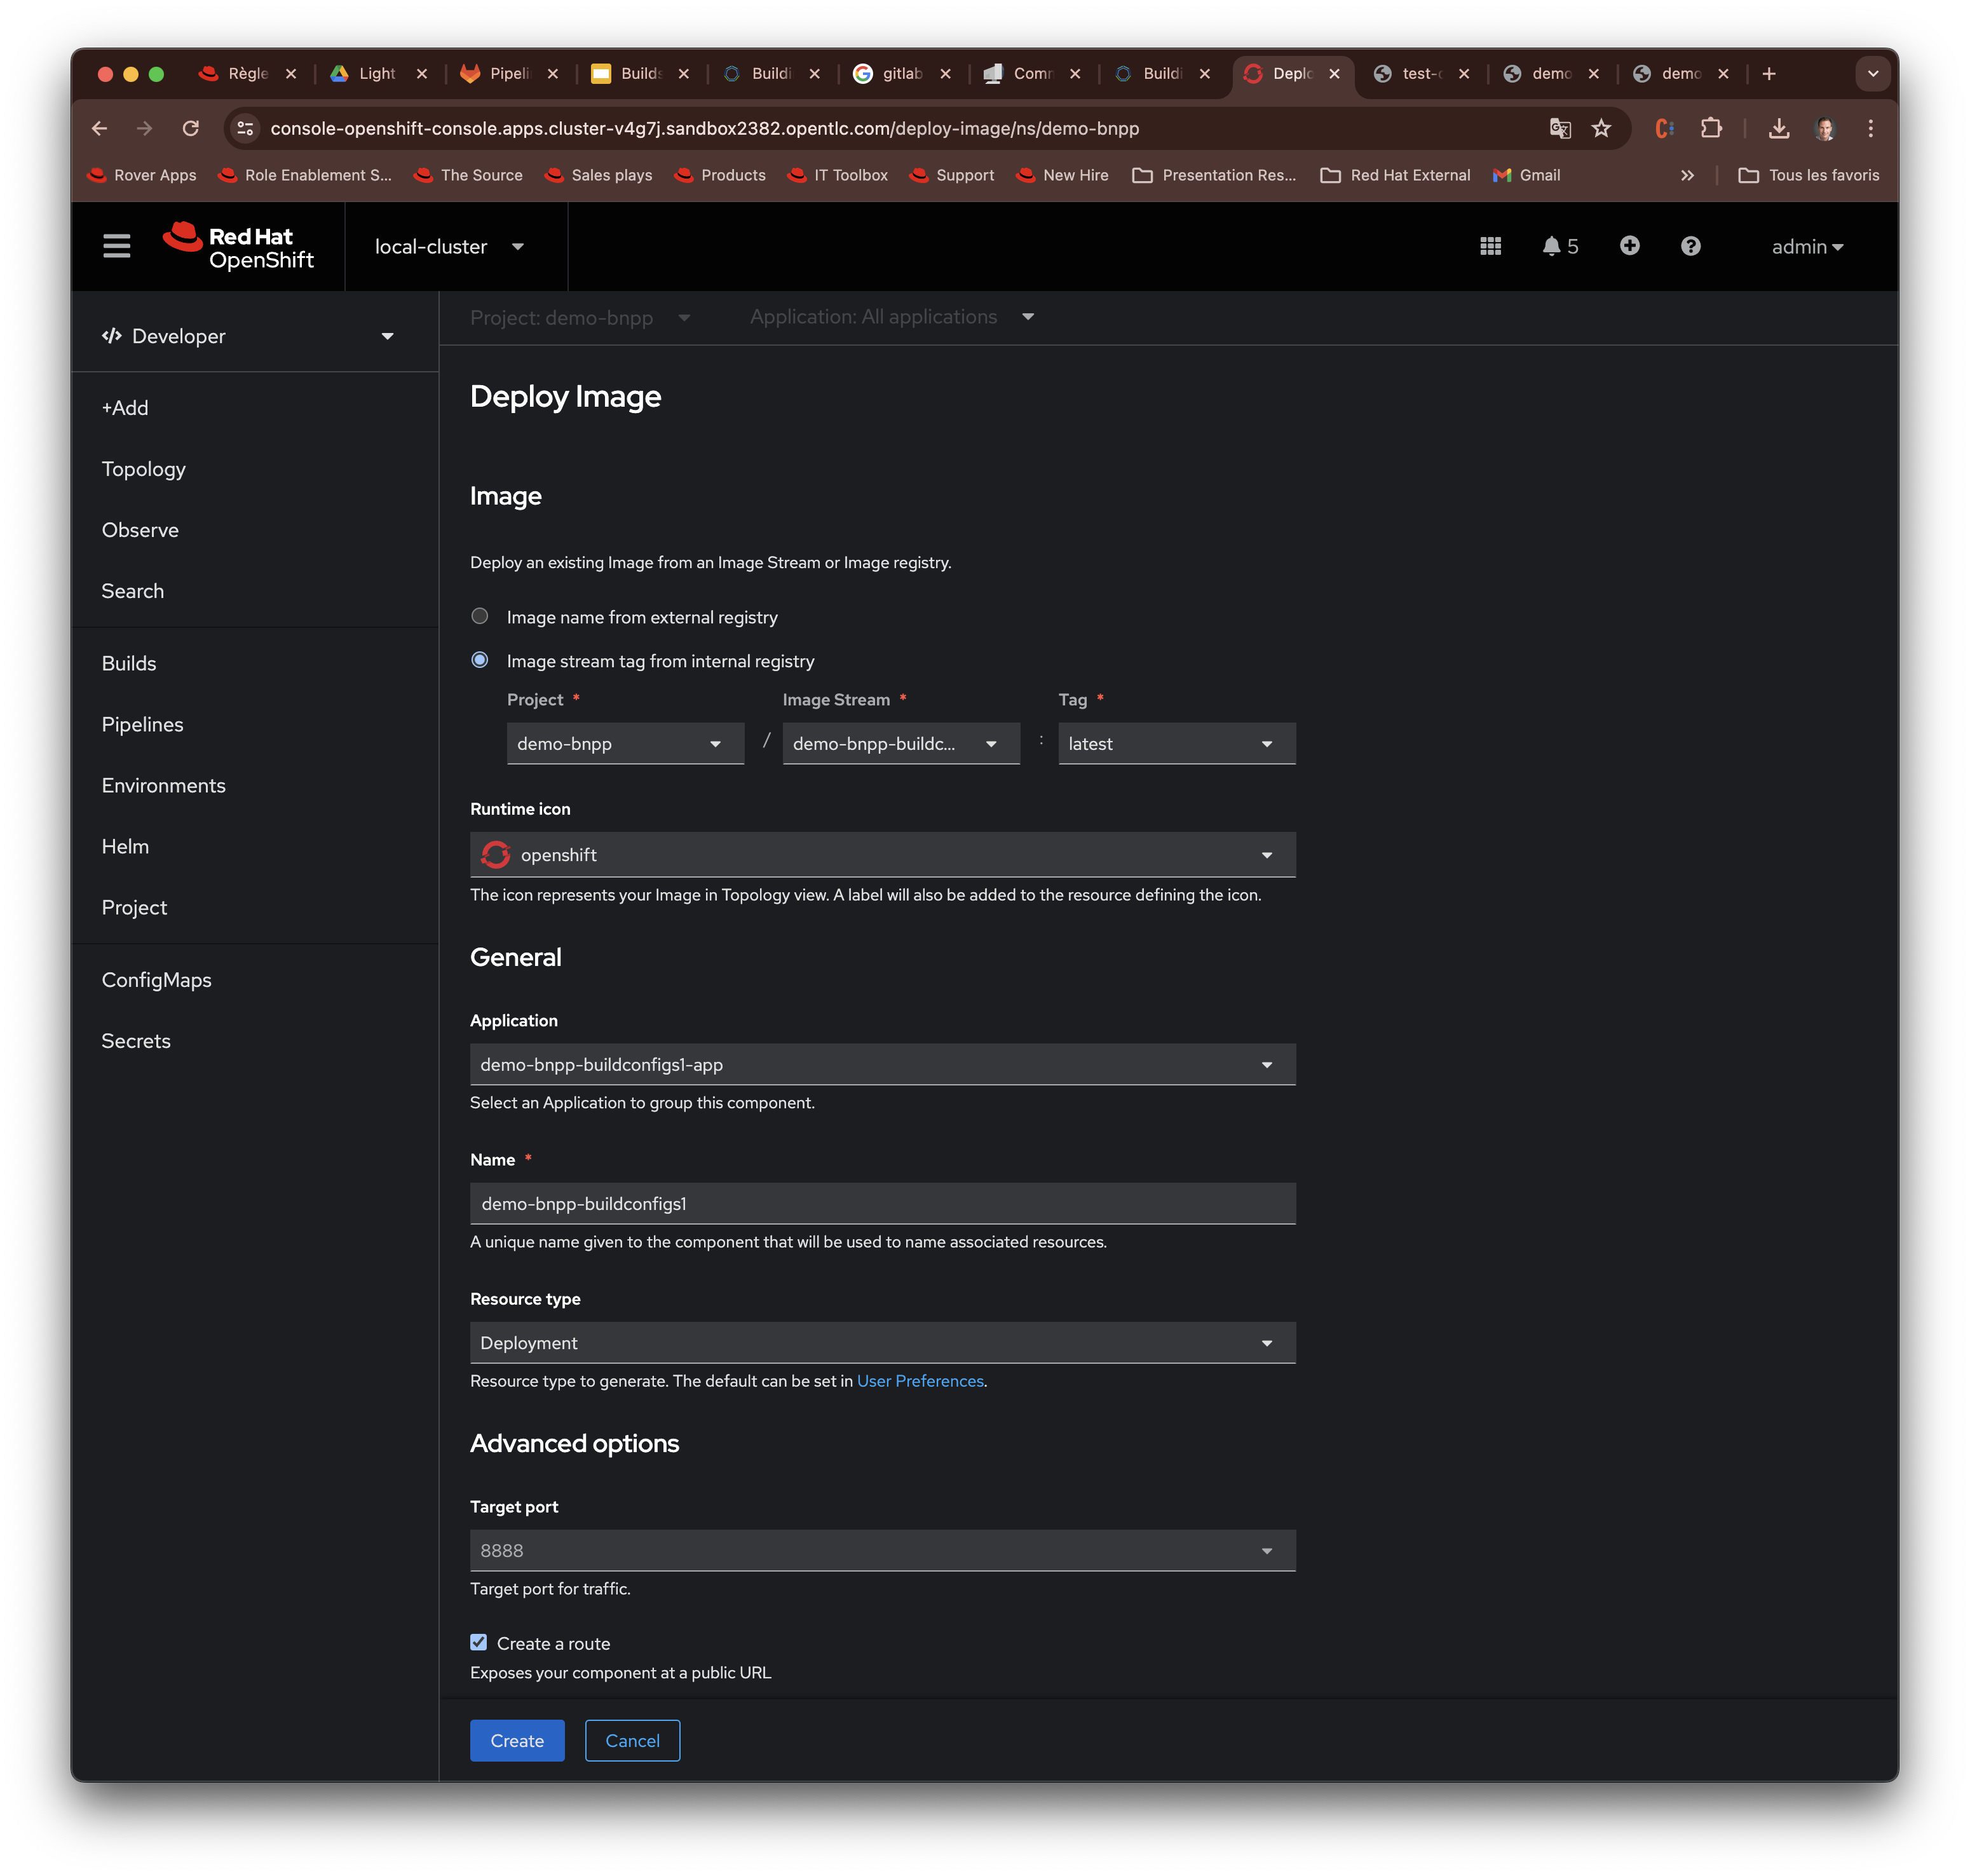
Select Image stream tag from internal registry and select the image you have builded, and click on create.

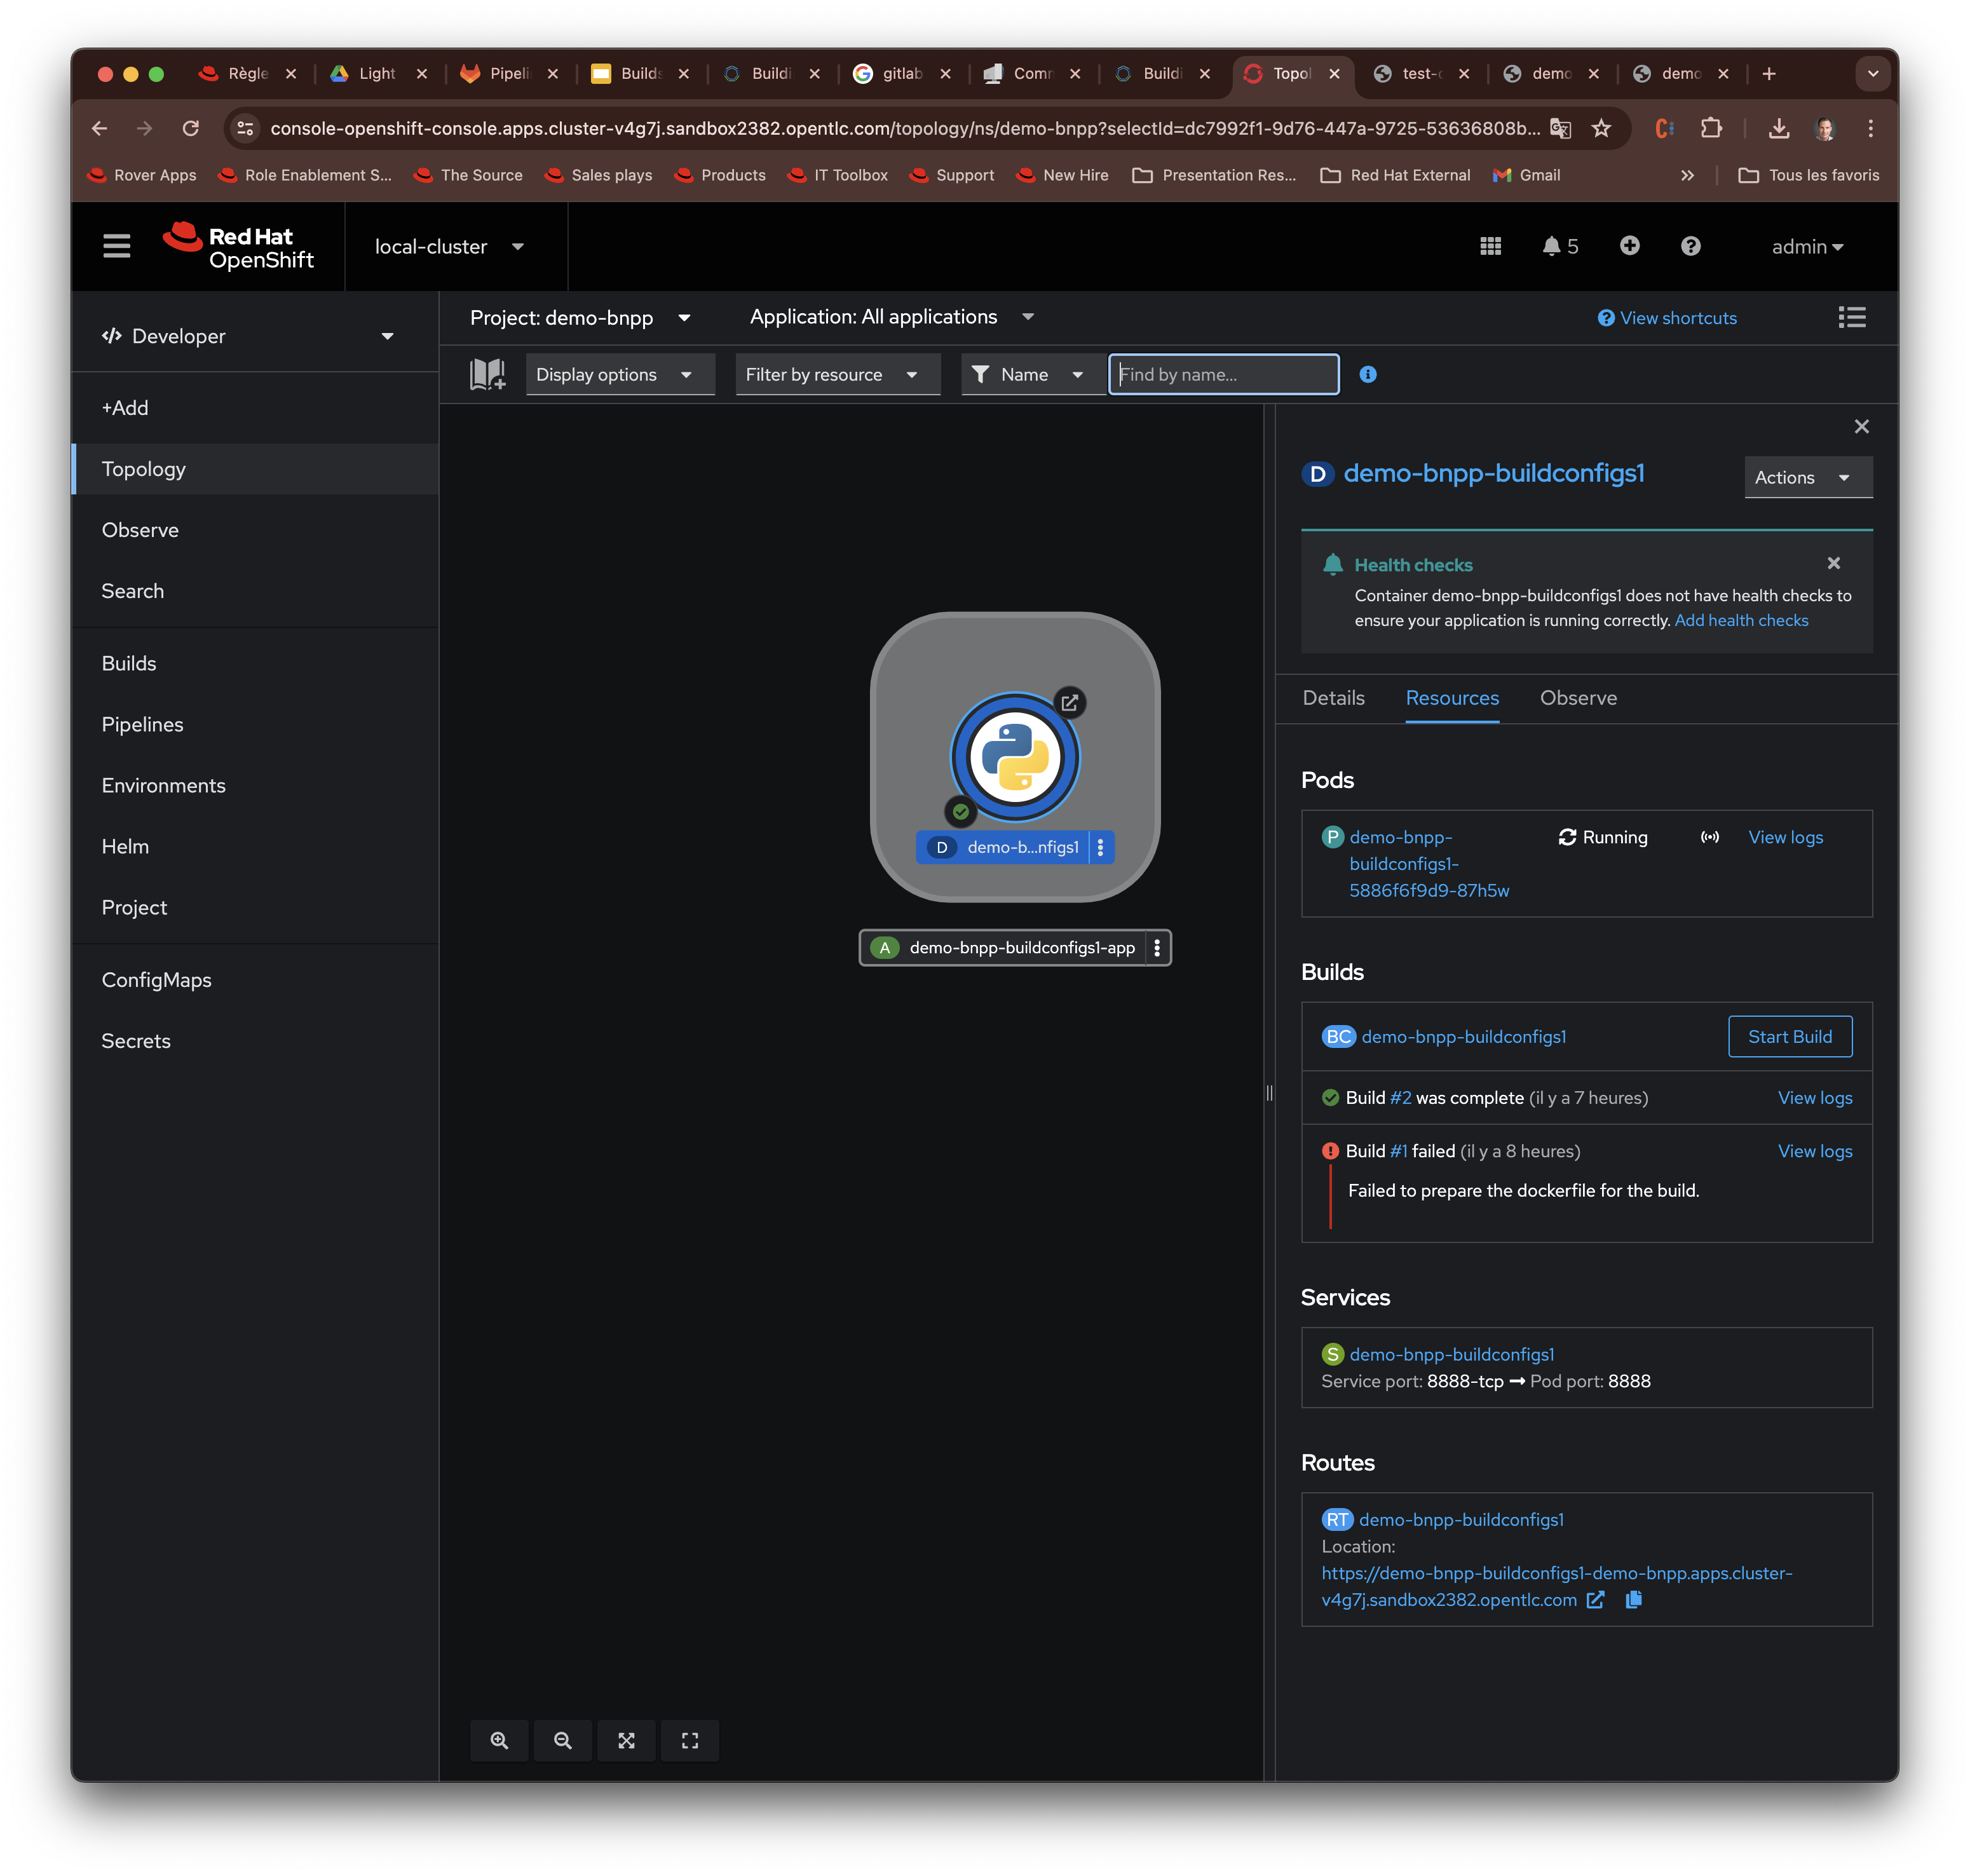
Your app is deployed


Conclusion
With these steps, you’ve set up a CI/CD pipeline in GitLab to build a Docker image using OpenShift. This integration allows you to leverage the powerful features of both platforms to streamline your development and deployment processes.
For more detailed information on builds in OpenShift, you can refer to the Builds for OpenShift Overview.
Happy building!
References
This guide should help you get started with building and deploying container images using GitLab CI/CD and OpenShift. If you have any questions or run into issues, feel free to reach out for support.
Authors
This blog post was co-written with my friend Sebastien Lallemand.
Linkedin :


